How to set up your new iPad and iPhone 8 or older
If you've just purchased an iPhone 8, iPhone 8 Plus, or iPad, set up is easy peasy! We've got the steps you'll take to get through the process.
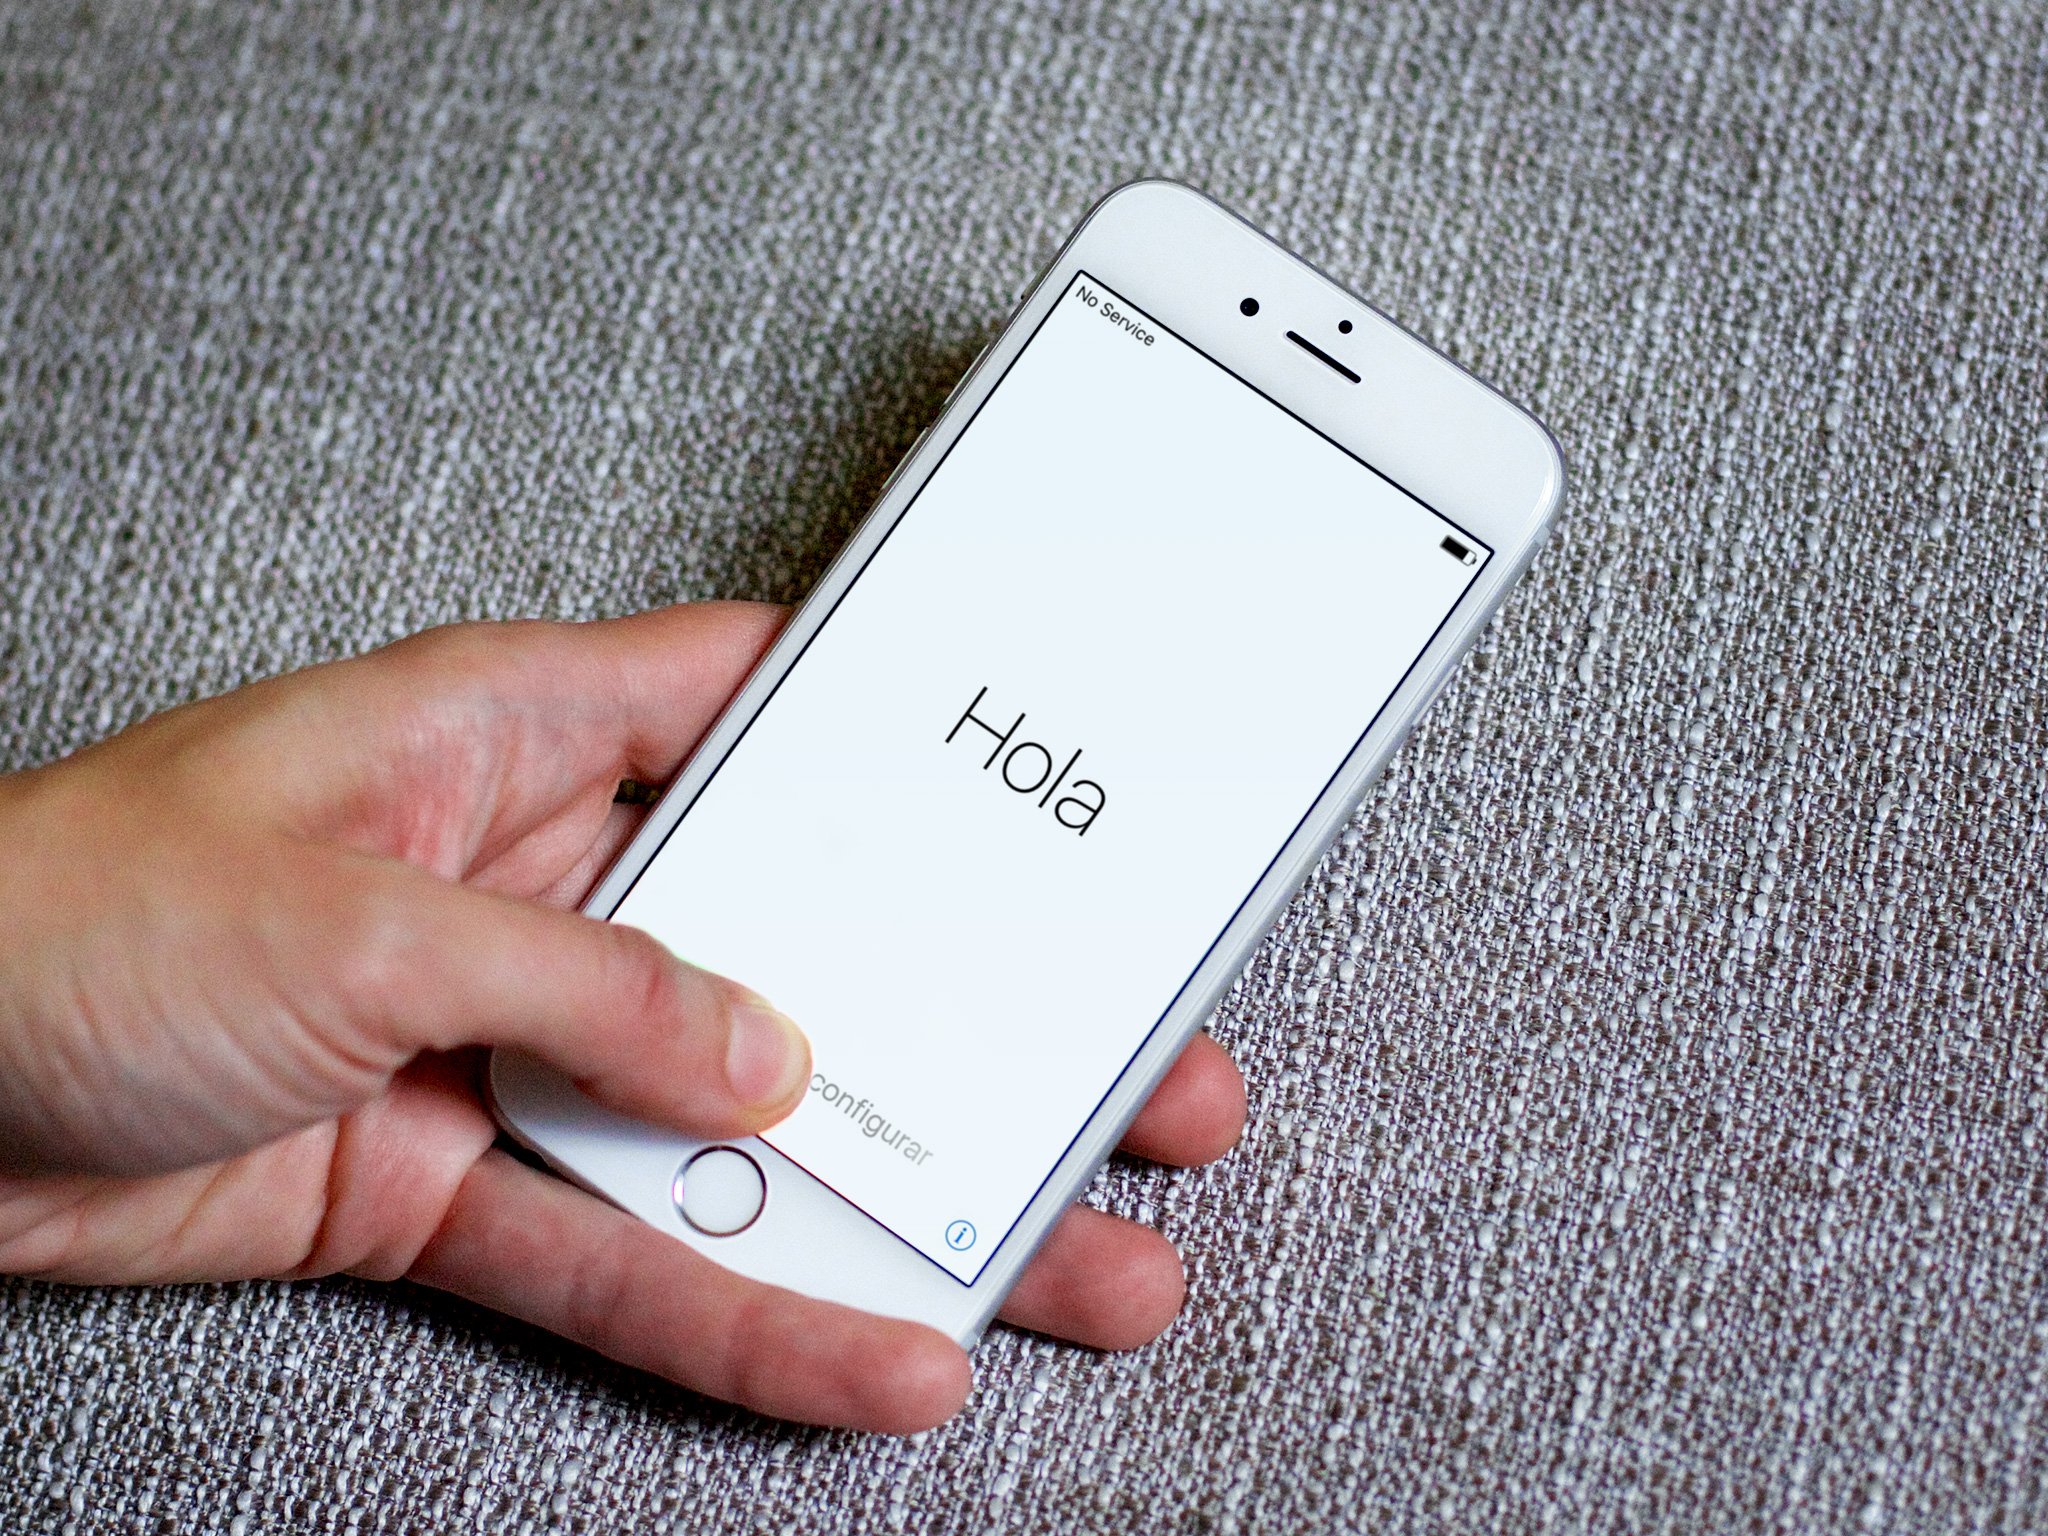
If you just got a brand new iPhone 8 or iPhone 8 Plus, iPad Pro, 9.7-inch iPad, or an older device, the minute you turn it on, you'll see a screen that says "Hello" in many different languages. That's your own, personal setup buddy, and it's here to help you make sure everything is configured and working just exactly the way you want!
Note: This guide is for iPad and iPhone 8 and older. iPhone X has a seperate setup process.
- Understanding your options
- How to begin setting up your new iPad and iPhone 8 or older
- How to restore or transfer your data from an old smartphone or tablet
- How to set up your iPad or iPhone 8 and older as new
Understanding your options
There are several ways to get started with a new iPad and iPhone 8 or older.
- Set up as "new", which means starting everything — every setting — from scratch. This is for people who've never used a smartphone or online services before.
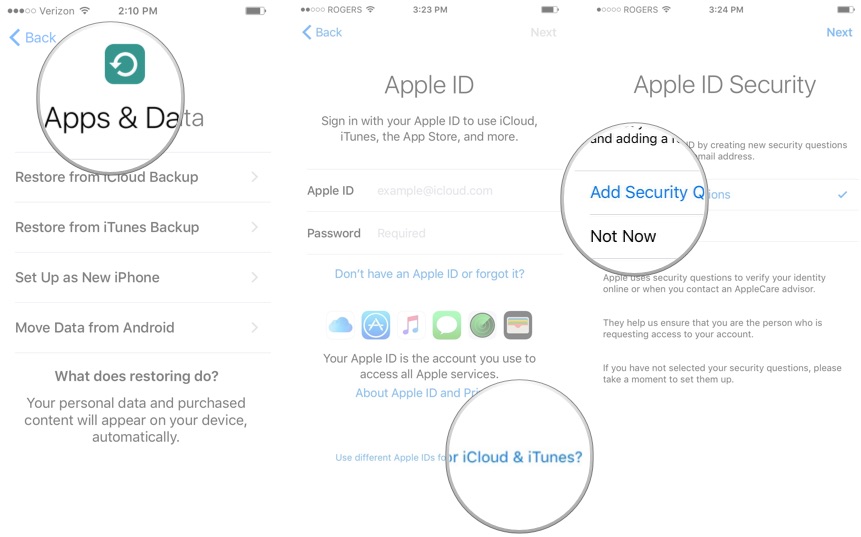
- Restore from a previous iPhone, iPad, or iPod touch backup. You can do that online with iCloud or over USB with iTunes. This is for people who've had a previous iOS device and are moving to a new one.
- Import from Android, BlackBerry, or Windows Phone. Apple has an app in Google Play to make Android easier, but online services let you move a lot of data over from any old device. This is for people switching to iPhone or iPad.
How to begin setting up your new iPad and iPhone 8 or older
Regardless of whether you're setting up as new, restoring from backup, or switching from another device, everything starts off the same way.
- Touch slide to set up and, as it says, slide your finger across the screen to get started.
- Choose your language. If you bought your iPhone or iPad in your home country, it should pick the right one automatically.
-
Choose your country or region. Likewise, this should default to the correct place if you live where you bought it.
- Choose a Wi-Fi network and enter its password, if necessary. If you don't have access to Wi-Fi or no networks are found, you can choose Use Cellular instead for an iPhone or iPad with data.
- Wait for your iPhone or iPad to activate. It can take a few moments. It can take a few seconds for your iPhone or iPad to activate, especially
- Choose whether or not you want to enable Location Services. You can always change your mind later, but keep in mind you'll need to enable at least some location services to use apps like Maps.
-
Set up your Passcode and Touch ID. You can skip this step by selecting Set Up Touch ID Later but security is important. If you need extra help, here's how to set up Touch ID on your new iPhone or iPad
How to restore or transfer your data from an old smartphone or tablet
As part of the process, you're given the option to set up your iPhone or iPad as a new device, restore from a previous device's iCloud or iTunes backup, or — for iPhone — move over your data from Android.
If you want to restore or transfer your data from an old iPhone, iPad, Android device, Windows Phone or Surface, or BlackBerry, here are your options:
- How to move from an old smartphone to your new iPhone
- How to move from an old tablet to your new iPad
Otherwise, you'll need to start as new. There's also the option of setting your device up as a new iPhone, rather than restoring from a backup, as detailed in the article below.
- Doing a clean install on your new iPhone or iPad? Here's what you'll bring over and what you'll lose
How to set up your iPad or iPhone 8 and older as new
If you're a first-time iPhone or iPad user and don't need to move your data, here's what you need to do. First, you'll need to link your device to your iCloud account. You have a few options for this:
- Sign in with an existing iCloud Apple ID — simply enter your username (typically your email address) and password).
- Tap Use different Apple IDs for iCloud and iTunes if that's how you have things set up.
- Create a new, free Apple ID.
-
Tap Skip This Step if you don't want to do either right now, or you don't have an Apple ID yet. You can always go back and create one or sign in from the Settings app at any time.
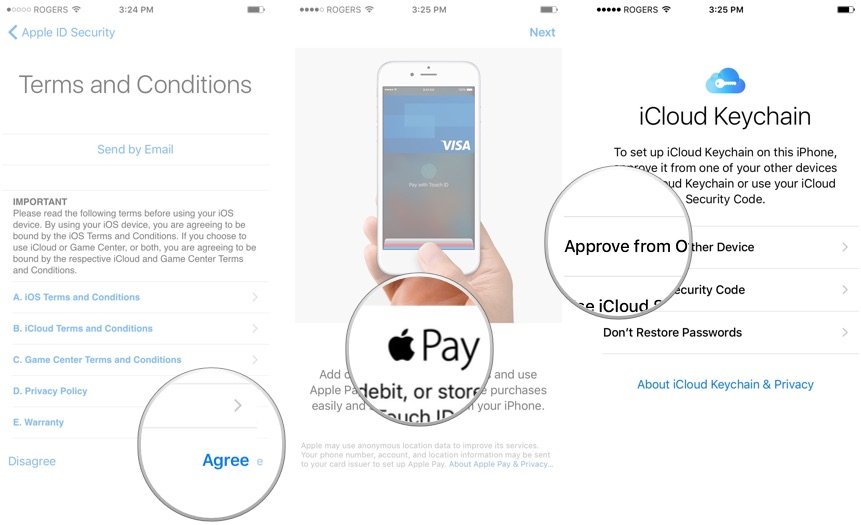
- Tap to agree to Apple's Terms and Conditions.
- Confirm that you agree one more time.
- Set up Apple Pay, Apple's Touch ID-based payment option, if it's available in your area.
- Set up iCloud Keychain, if you want to store and sync your passwords across all your devices
-
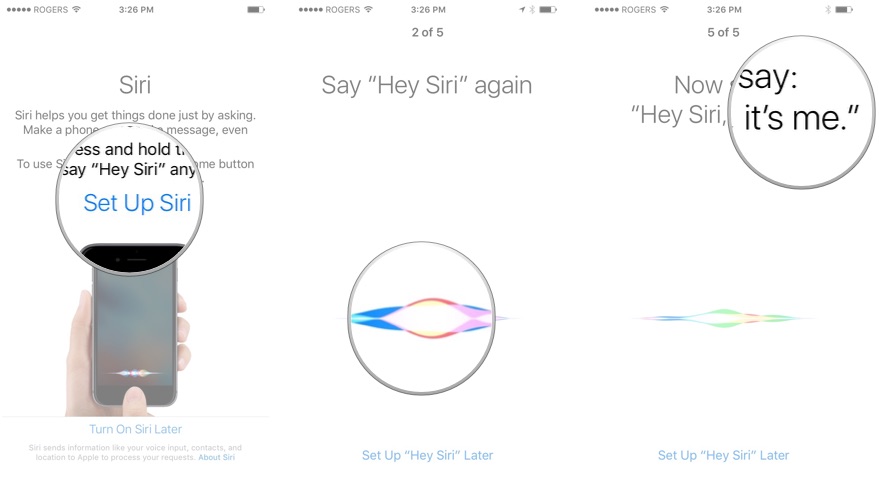
Set up Siri, Apple's voice-activated assistant. If you need extra help, here's how to set up 'Hey Siri' on iPhone and iPad
-
Also set up "Hey Siri,", if you want to automatically trigger Siri with the aforementioned catchphrase.
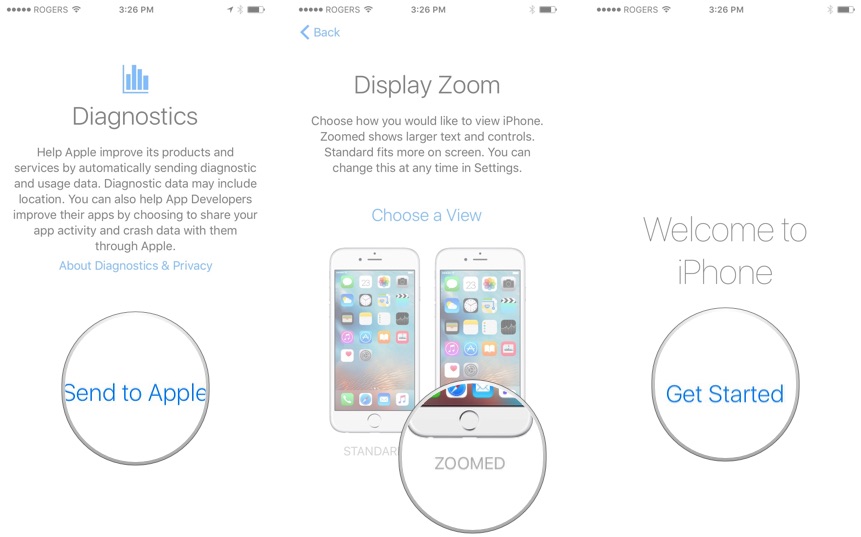
- Tap to send Diagnostic information to Apple when apps crash or other issues arise. If you'd rather not, just tap Don't Send.
-
Turn on Display Zoom, if you need the extra visual accessibility of a larger interface.
And with that, you're done with the initial setup process for iPad and iPhone 8 or older!
Questions?
Any other questions about the initial setup process for iPad and iPhone 8 or older? Let us know in the comments.
from iMore - Learn more. Be more. http://bit.ly/2A4vWNr
Powered by IOSCUBE


No comments: